This year I will be sharing more about how I do what I do both for those who appreciate fused glass art and others who create it. I am inspired by other artists and hope I may do the same for someone else. I love connecting with anyone who appreciates art so be sure to email or tweet me to let me know if I have inspired you!
It's been a while since I first introduced
Fusography and I have been wanting to share some behind-the-scenes photos and information on the process. Creating fused glass pieces with full-color images is a multi-step process that takes about two weeks from start to finish. Of course, the time frame depends on many factors such as the type of piece being created, whether or not glass needs to be ordered and number of pieces being fired.
 |
| Finished coaster featuring one of my 'Knoxville Coffee' images |
The easiest way to explain it is step-by-step and include photos. {Be warned that these photographs are horrible. As a professional photographer, I have access to equipment and lighting, but forgot that all my gear was at the studio and not at the house. Ugh!}
Some of the step-by-step will depend on if I am creating pieces to sell or if I am filling a custom order. If it is a custom order I will know what I am creating and the images being used, so the first step would be much easier.
First, I will make some sketches or a list of the types of pieces I want to create. In this case, I was creating a set of four 6 inch square plates to fill a custom order as well as coasters and nightlights, so there wasn't much to sketch, but that would typically be the first step. Part of the first step would also be to determine how many pieces I can create from one sheet of decals. The sheet size is 10 inches by 15 inches and the printer suggests filling the entire sheet. More bang for your buck! To fill the order for the four plates, I had to order to sheets, which meant I had to find some additional images to print.
 |
| Blanks ready for decals |
Second, edit all of the images {if they haven't already been edited} and put them onto the decal sheet template. My husband does this for me because he is our editor and this is way easier for him than it would be for me. Once the sheets are created they are saved as an image file and eventually uploaded to the printer. The printer has a super easy on-line ordering system including payment so it doesn't take very long once the sheet files are created. The printer fills orders once a week, which can add additional time to an order depending on when it is placed. Orders are submitted by Tuesday, printed on Wednesday and I usually receive the decals on Friday. Planning ahead is key!
 |
| One full sheet of decals ready to be cut |
Next I will create all of the blanks I need for the pieces receiving a decal. Most Fusography pieces will be white glass because white does not print and if the image has white, it will need to show through. Photos of people will almost always need to have a white blank so teeth and eyes will reproduce normally. Most blanks will be full fused, but some piece, such as nightlights will not have to be fired before the decal is applied.
 |
| Kiln full of blanks ready to be fired |
One the blanks are fully cooled from the firing, I will clean them and prepare them for decal application. Applying the decals is a bit like cooking. The printer provides complete instructions for getting the decals off the paper and onto the glass. They highly recommend using distilled water in an electric frying pan. I have trouble following directions and use regular water and a regular pan. If you are a glass artist reading this, I would follow the printers instructions.
 |
| Heating the water for the decals |
Getting the decals off of the paper and onto the glass is a bit of a process and requires patience. I have little patience so this step is very challenging. I go ahead and cut all of the individual decals from the sheet so I don't waste time. The warm water in the pan will evaporate so you need to work quickly. After the decals are cut, I take them, one at a time, and place them in the warm water until the decal curls, then I remove it with chopsticks and being the stressful process of 'sliding' it onto the glass.
 |
| Cutting the decals requires patience and good scissors |
I recommend heating the piece of glass you are working with using a heat lamp, heat gun or even a hair dryer. Once the decal cools off it becomes stiffer and more difficult to work with. Placing it on a heated surface allows it to stay malleable longer. After you painstakingly slide the decal onto the glass and make sure it is both straight and unwrinkled, you will squeegee the air bubbles out. I use a couple of credit cards for this. Do not apply excessively heavy pressure or you will tear the decal.
 |
| Tools for placing the decals on the glass |
 |
| Customer's images were used to create plates. Decals have been carefully placed. |
 |
| Decals both on and off coasters |
Once your breathing has returned to normal and you have massaged the massive kink out of your neck, it is time to dry all of the decal-covered blanks and prep them for the kiln. I have to apply the decals in my kitchen and then take all the blanks back out to the studio so I use a cool vintage tray to transport the pieces. Avoid stacking the pieces until they have been fired. Just to be safe.
 |
| Decals on nightlight blanks |
Firing the Fusography pieces is the next stressful step in the process. It's stressful because you have to create a program for the kiln and when I programmed it the very first time I was panicking that it wouldn't work correctly. It did, but I still get nervous. Follow the instructions from the printer and you will be golden. One thing to remember is, the kiln must be vented for what amounts to the first 4 to 6 hours of firing, so make sure you will be near your kiln to close it down at the appropriate temperature.
 |
| Kiln is full and ready to begin the 18 hour process |
Now, you patiently wait for the decals to be fused to the blanks and pray that you removed all of the air bubbles when you applied the decals. The firing schedule will take about 18 hours to complete. Once the pieces are at room temperature, you can remove them from the kiln and prep them for slumping or draping, if necessary. Fusography pieces can be slumped and draped just like any other fused piece. I have not experienced any crinkling or stretching, but results may vary depending on the piece and mold used.
 |
| Plates after slumping |
 |
| Coasters after firing |
 |
| Nightlights after firing |
That is the last step in the process. Each piece can involve up to three firings and additional design and preparation time, which is why these pieces are more expensive than the rest of my fused glass art. And each piece is truly one-of-a-kind. Think of the possibilities! Pendants, rings, earrings, plates, platters, bowls, vases, coasters, business card holders, art panels and more can be created with your own full-color images or any of my available images {soon to be released}.
 |
| Close up of finished plate. Photo is horrible, but the image quality is actually great. |
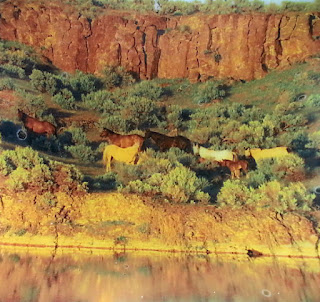 |
| Another close-up. |
Let me know if you have any questions about this process, where to get the decals, type of equipment needed or if you are interested in taking a Fusography class.
This class will soon be available as a video and ebook! I plan to have it completed in the summer of 2016, but you can sign up
HERE to be the first to know when it is available for purchase!


